This is the long-awaited follow-up from previous posts about slow-fashion, mending, upcycling and thrift-flipping (link here!). I present to you, T-shirt upcycling featuring my large hoard of t-shirts I can’t really donate or sell due to bad condition or nostalgia. I basically have 35 t-shirts reserved that I almost never wear, either too small, stained, or feels scratchy, or way too big even for a sleep shirt. I decided to do something about it this summer instead of buying new shirts! (But… I ended up buying a few new t-shirts this year anyway lol).
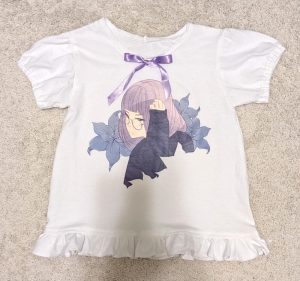
First up is this lolita style casual cutsew, made in almost the exact same way as previous cutsews I’ve made, from a regular unisex medium t-shirt I got at an artist alley, kind of thick and itchy so I don’t wear it often. I cut off the collar, the sleeves and the bottom 4 inches of the shirt. I re-attached a handmade bias binding of same fabric to the collar, then took in the sides by an inch to slim the shirt and make the arm holes smaller (this is the new step). Then I gathered the top of the cut off sleeves and ran elastic through the sleeve hem to make a puffed sleeve and sewed them back to the shirt. The bottom hem was cut in half lengthwise and made into a long ruffle strip which I sewed to the hem with a straight stitch and top stitched. The lavender ribbon I already had and just pinned it on for photos, I didn’t attach it permanently. Now the main advice I have if you want to follow the above steps is that when you take in the sides to make the arm hole smaller, you lose precious width across the chest area. I would not recommend doing this for a shirt that’s only a little bigger (like medium to small). I would recommend a shirt that at its narrowest point fits comfortably over your widest chest measurement with room for seams (preferably large to small). This resulting cutsew looks cute, but because the fabric is itchy, I only wear it for quick errands like groceries.
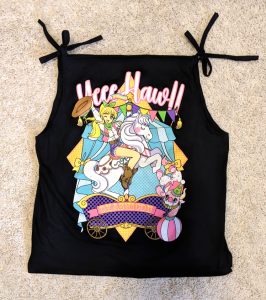
Next is a tank-top shirt for summer pajamas made from a convention souvenir. This is sort of based on a previous tank I made from a tutorial on Livejournal. I took a medium shirt that fits well and isn’t scratchy, then cut off the sleeves and the collar straight across. I used those scraps to make a super long bias binding to bind off the sleeve edges then were formed into ties that I can knot at the top at whatever length I wanted. I folded down the neckline and sewed across with a straight stitch. Extremely easy to make, no measurements or gathering or special techniques needed. However, the tricky part about this shirt is that when you cut off the sleeves, the resulting sleeve holes are quite large and to make it a shirt you can wear outside, you have to tie up the ties high and then the collar edge flops outward at that point. This could be fixed by tapering the front/back collar edges if the t-shirt print design allows, or sewing up the sleeve holes to be smaller, but I didn’t want to spend any more time on this, so I left it floppy and just wore it at home as a pajama shirt.
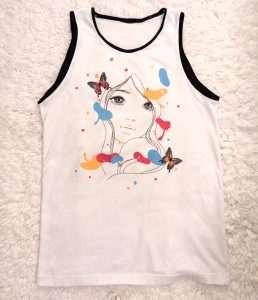
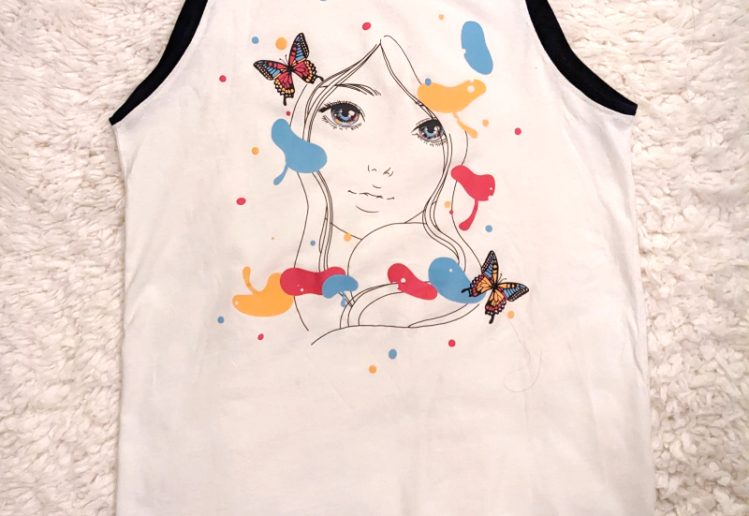
This is another tank top I made for summer home wear. The t-shirt bought at an artist alley was perfectly comfortable as is, but I wanted to experiment and make a different design. I decided I like ringer tees so I made a ringer tank top using black t-shirt fabric from the previous shirt and other tees in my scrap bin. Just cut off the sleeves and collar, then fold long strips of fabric to make bias binding and sew onto the raw edges. You can wrap the edges like real binding, or just sew the open edge of the binding on the raw edge of the shirt then fold over and top stitch which is what I did. This tank top turned out great, I think my only issue was the bias binding was a little narrow and my sewing machine did not like feeding all of those layers through, so the sewing is a little crooked. I actually do wear this tee out for errands, so I could still wear this sleeveless tee out in the summer too.
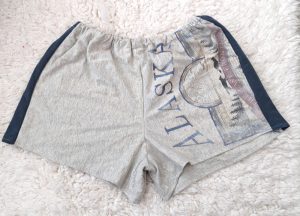
This is a pair of sleep shorts with elastic waist made from a large t-shirt my friends bought me when they went to Alaska when we were teens (so over 25 years ago). The shirt is faded and worn and not great for wearing as a pajama shirt anymore, but I didn’t want to throw away a shirt my friends bought me, so I decided to rework them into shorts because I always need shorts. The shirt was just a little too small to cut out the four pant leg parts, so I decided to piece the inner leg bits that no one will see anyway, and then I added strips of fabric to the sides from the shirt sleeves to make a contrast stripe. Overall a success, relatively comfortable since the shorts were so roomy that the pieced parts didn’t feel too annoying on the interior, and a great way to keep a memento of my friends! Except no pockets because I was too lazy.
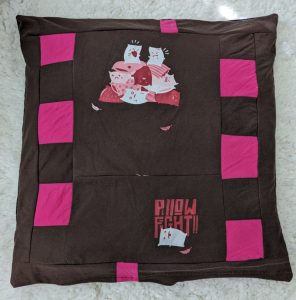
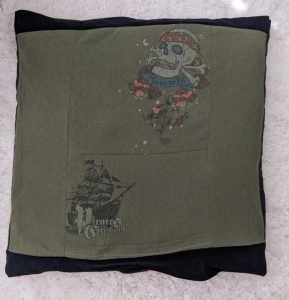
This is a floor cushion I made out of scraps of 4 t-shirts, an old bedsheet, and lots of fabric scraps too small to reuse as well as some old polyester filling from an old pillow that I use for cosplay stuffing. My goal was to make a cushion and stuff it with fabric scraps saved from previous sewing projects, however, as I learned from past attempts, stuffing with just cloth is not ideal and makes a lumpy item. That’s why I also stuffed it partly with polyfill to keep it light and fluffy and comfy. The inside pillowcase is made from an old bedsheet, the outsides are from t-shirts where I left a hole in one seam so I could easily take off the cover and wash it if needed. The first t-shirt side is made from an old brown logo t-shirt quilted together with scraps from a hot pink t-shirt. I didn’t focus on making the quilting symmetrical, it was fun to make a freehand design from the back and front sides into one large square. The second side is made from an ancient Pirates of the Caribbean tee that is soft from age but too small and stained. So I cut the front and back logos to make the center panel and the sides from the remainder, but it was still a little small/narrow, so I used black fabric scraps to make the top and bottom pieces.
I do sit on the floor to cut fabric and patterns and flip through my books and magazines, and my knees and butt hurt after a few minutes, so this cushion has been a lifesaver for my aching old bones. I have a dog bed floor cushion for the living room, so I’m tempted to make another floor cushion for my bedroom with the rest of my fabric scraps/polyfill/t-shirts/bedsheet combos.
Some tips if you plan on upcycling your own tees!
- Try to match fiber content or stretchiness of shirts if you’re piecing different tees together (like poly/cotton blends).
- You don’t need an overlocker or elastic stitch to sew knits as long as you’re not sewing anything too form fitting like a swimsuit or leggings. If you’re sewing a lot of items that have to stretch a lot or you’re planning on selling, I’d recommend getting a serger, but I’m sewing knits for upcycling fun occasional wear or pajamas so a regular home sewing machine is good enough.
- Feel free to adjust stitch length or tension or switch out needles because knit fabrics are not as easy to work with as the equivalent woven fabric.
- T-shirt fabrics don’t have to have seam finishes since they won’t unravel easily, but consider binding or at least double-stitching areas that go through a lot of stress and pulling, like neck holes or crotch seams
Here are my plans for the next projects stewing in my brain, besides a second floor cushion…
1. a too small black concert t-shirt into a larger long-sleeve t-shirt using remnants from other shirts
2. a nautical themed sleeveless tee with a sailor collar from another shirt?
3. a gothic lolita style cutsew from a too-small Hello Kitty t-shirt combined with a different tee
4. another peasant style top with ties similar to the previous otome top I sewed, but from multiple knits (probably white?)