
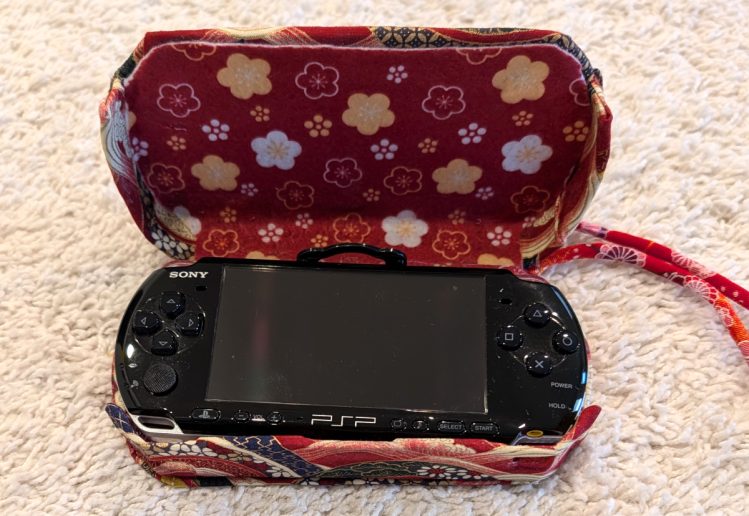
Even though I have so many other urgent sewing projects I could have done this week, I decided to customize this broken old PSP case instead lol. I actually do have a good reason why I did this project! First off, I have Nintendo DS consoles that flip closed and don’t really need a hard case to protect the screen, and I bought a hard case from Daiso for my Switch, but I only have a flimsy PSP logo bag for my PSP which does need screen protection, while this broken hard case my brother and I got years ago technically still works at protecting the screen. Secondly, I wanted to try my hand at working with the old peeling fake leather on this case before I work on fixing up actually pretty items like shoes and purses. Finally, I want a relatively quick and easy project (none of my cosplays or J-fashion projects are easy or quick) to feel proud and productive.
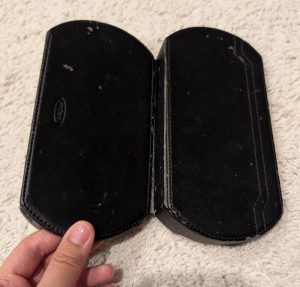
Here is the original PSP case we bought, which has a magnetic front closure and can open up almost fully using magnets at the back to keep it propped up at an angle for some reason, I guess if you’re watching a movie. This hard case is covered with felt on the inside and has fake leather outsides that is now peeling from like 20 years of storage. The sides of the case are also cracked and getting loose because the magnets are so strong it’s difficult to open without a handle to hold on, so it’s been under physical stress. I could just buy a cheap plain zipper case like for my Switch, but honestly, those cases are ugly and also don’t have holes included so I can charge the console while it’s snug in its case. I decided to see how far I can customize this case instead, being inspired by Emieclat, a Canadian Youtube crafter who customizes and creates a lot of unique containers among other items.
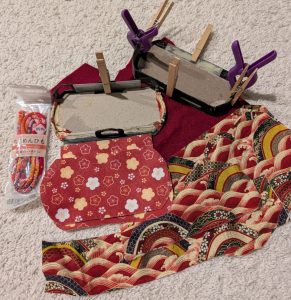
Here are my materials, centered on a red/yellow/white Japanese woodblock and floral prints, sourced from online fabric shops and Daiso. I bought nothing new for this project, due to concerns for the economy and environment and also me being lazy lol. I stripped the black leather and felt off, revealing a thick cardboard and plastic structure, and I took out the magnets because they were rusty, then added the two shiniest pieces back into the top lid and used weak magnet tape cut to size for the bottom of the case. I used strips of plastic sheet from Daiso and wood glue to reinforce the holes where the other magnets went and the sides, then clamped them for a few hours/overnight to try to make it sturdier. Hot glue could have worked but I feel like hot glue doesn’t hold long especially in heat/humidity and creates lots of ridges and bumps, and I prefer the workability and strength of wood glue even if does require clamping and a moderate amount of dry time. I then roughly cut out the printed felt to fit the interior, and the plain felt to pad the top and bottom covers that were going to showcase this beautiful cotton print with metallic gold accents.
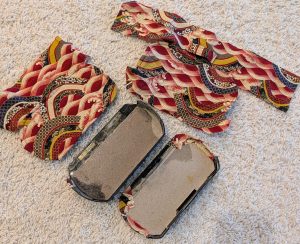
The finished top and bottom covers, where I sewed the side panels on one side for even more stability. I also quilted the top panel with freestyle wavy lines because I wanted it to look extra home-made and unique. I started gluing strips of fabric to the trickier parts of the sides to cover up any of the original structure. At this point I began to realize that switching out the strong magnets for weak Daiso magnet tape was a mistake, because the glue and plastic and fabric layers interfered with the magnetic bond and the two pieces barely attracted. But I had no other choice, the old magnets were too rusty and gross, so I just put another piece of magnet tape onto the first pieces. I also made a little loop of the same cotton fabric and sewed it to the side panel of the top.
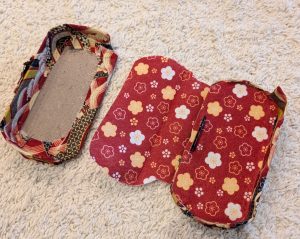
Here is a shot of the interior with the cute printed felt glued down on the bottom side and the top felt inserted in between the layers of fabric and case to make a hinge (like in the original case). I made another mistake here, I cut out the felt hinge piece the same size as the old piece, but I should have glued it with more clearance to accommodate the added bulk of fabric and felt, it was just a few millimeters too tight to open and close fully. Next, the top and bottom panels were glued on and the side panels folded over the side lip and also glued down. Then I cut out holes with sharp scissors where the original holes were and folded back the front cloth to glue down through the backside. This does leave a raw edge but it’s on the inside and very securely pasted down, so I’m not bothered, you wouldn’t notice unless I pointed it out.
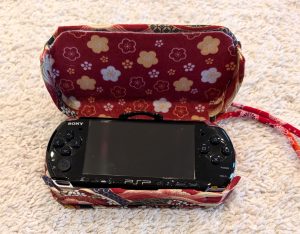
At last, the PSP in its new home! The console fits just fine, plus the holes are still present for charging (on the right side) and I forgot what the left hole is for, but I think it’s for sound. Clearly this is not a waterproof case, but in another sense, the case is even sturdier now that I don’t have to worry about scuffing the pleather. As mentioned, the top lid doesn’t close due to the hinge being too short and it also doesn’t really stick magnetically, but that’s why I thought ahead and had the cord ready for attachment through the back loop.
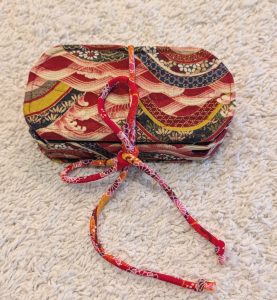
Here is the cord in action, keeping the case closed should I ever need to travel with my PSP. Like I said, the only 2 mistakes that I would have liked to do over (but I’m too lazy) is the magnet closure and the hinge being too tight, but the matching cord takes care of both problems, and also makes the case look old-fashioned and cool. Overall, I’m extremely happy with the end result – I used up a bunch of lovely matching Japanese prints from pieces too small to make clothing from while also protecting my PSP in a much more functional way than a zipper case would have, and technically saved myself money from buying a new case and keeping some plastic out of the dump (although I did throw away the top and bottom pieces of pleather so not that much was saved lol).
I am going to double my efforts to learn how to eliminate plastic from long-wearing items and replace with cotton or linen cloth or literally any other material. While fake pleather does feel nice and smooth and has fun colors and textures, that material turns to dust in my house within a few years, so I want to practice restoring certain objects like shoes and purses as much as possible with cloth or real leather. Honestly, I might redo cases for my other handheld gaming consoles in the future with different themes/colors of fabric, this was actually fun and cheap and not too difficult or time-consuming. Stay tuned!
[…] the small but no less important pride of having redone my old PSP case earlier this month, I also made a fabric tool roll case similar to my handsewing husswif, this time […]